
As pickles go, Bread & Butter Pickles are probably my favorite, although I do like the sliced Clausen dill pickles on sandwiches. I like the crunch and they have the perfect “dill-ness”. Anyway, back to the Bread & Butter Pickles–and have you ever wondered how those pickles got that name? Me, too. So check out what I found on the Mt. Olive Pickles website. And just a little side note: Mt. Olive Pickles is located right here in North Carolina.
Our garden has produced pretty well this year, and the cucumbers are probably the highest volume of all our vegetables. Yesterday I put up 10 pints of these Bread & Butter Pickles from just one day of picking. Next year we won’t plant as many cucumber plants. We really like cukes, but you can only eat so many at one time. Of course, we have shared our bounty with others, so they haven’t gone to waste. But we can only eat so many pickles, too!
If you have ever done any water bath canning, then you know the process once the pickles are in the jars. As for the recipe itself, I looked through several on the web and combined a few ingredients from my favorites to come up with my own twist on a pretty universal recipe. If you need help learning about how to can, a great resource would be Fresh Preserving . They really know their stuff and, you know, their names are on the canning jars, aka Mason jars.
It’s so satisfying to look at those filled jars–and listening to them ping as they seal–and knowing that you have preserved something from your own garden that you can use from throughout the year. Try as a compliment to this casserole.
Self reliance. It’s a beautiful thing.
A jar of canned food can be a nice gift, too.
Print
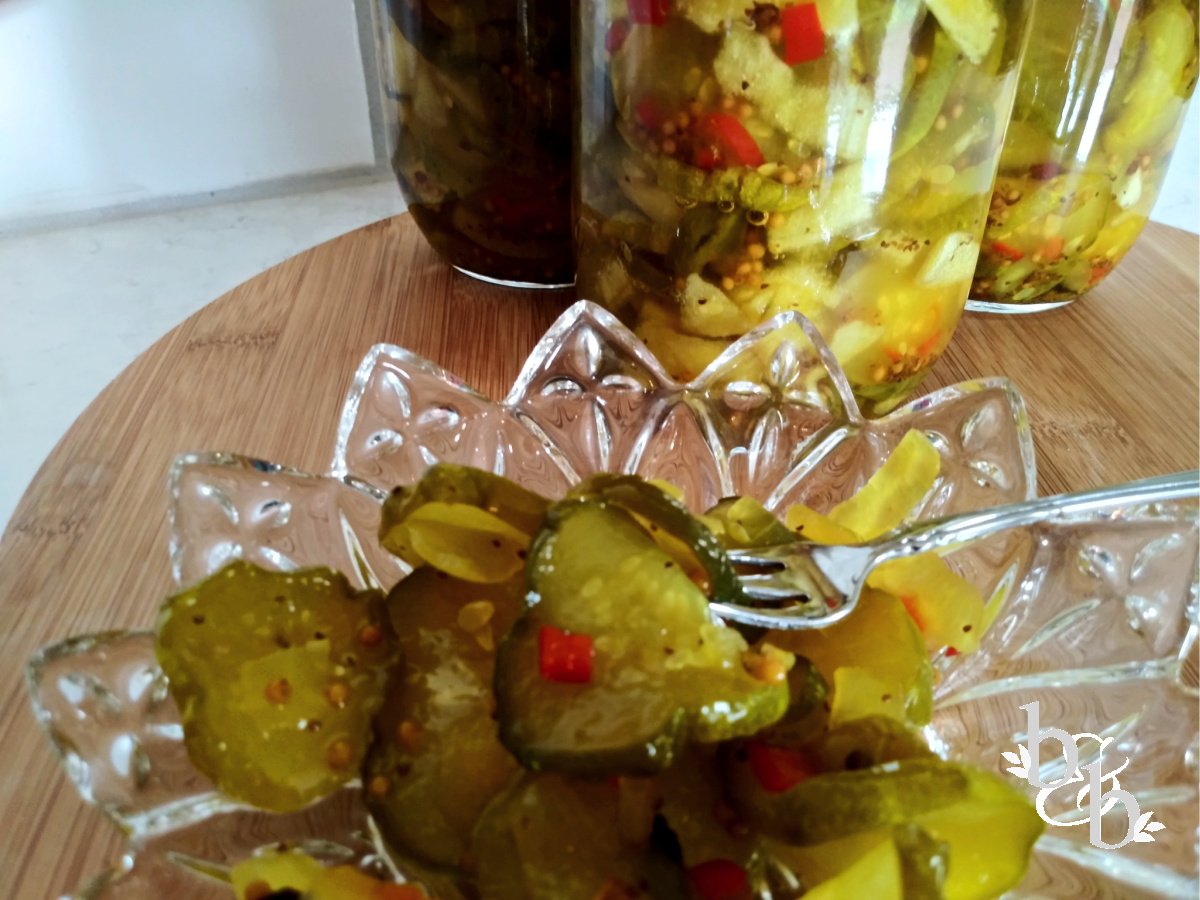
Bread & Butter Pickles
Description
Bread & Butter Pickles are a sweet and tangy addition to just about any meal, except maybe breakfast. But hey, go for it!
Ingredients
- 7 pounds (approx.) of pickling cucumbers
- 2 cups of sliced onions
- 1 medium green pepper, diced
- 2 mini sweet red peppers, diced
- 1/2 cup Kosher salt
- 4–5 cups white vinegar
- 4 cups sugar
- 2 tablespoons mustard seed
- 1 1/2 tablespoons celery seed
- 1 tablespoon pickling spice blend
- 1 teaspoon turmeric
Instructions
- Wash unpeeled cucumbers and drain.
- Slice off about 1/2 inch on each end of the cucumbers, and discard. Slice cucumbers into 1/4 inch slices.
- Coarsely chop the onions. Place in a large pot along with the cucumbers. Stir gently to combine, then sprinkle the salt over the mixture, but do not mix it in. Cover this mixture with about 2 inches of crushed or cubed ice. Place in refrigerator until you are ready to process them, but at least 3-4 hours. I put mine in the fridge in the afternoon and just waited to process them the next day when I had more time.
- You will need to sterilize your jars, so I found a quick and easy way on the internet. Preheat your oven to 320 degrees F. then place your jars in a sheet pan, place on rack in oven for 15 minutes. Remove and set aside to cool.
- Set up your “canning station”. I put the canner on the front right burner on my stove with enough water in it to come to about an inch or two above the jars. Start that to get a good rolling boil. Place your rack in the top of the canner. There are notches on the handles to allow it to sit on the top edge while you fill and place the jars. Also set up a space to the right of the canner to set your processed jars. You need to have a towel, or a dish drying mat works great, to set the jars on–not directly on the counter.
- Have a pot of warm, not boiling water, on another burner–back left works great– set on low. Place your lids and rings in this pot so that the rubber on the lids stay soft to get a better seal on the jars.
- Drain cucumber onion mixture, rinsing well to remove salt, and let drain.
- In a large pot add vinegar, sugar, mustard seed, celery seed, pickling spice, turmeric, and red and green peppers. Bring to a boil over medium-high heat and boil for 10 minutes.
- Add cucumbers and onions to the pot and boil for 1 minute. Remove from heat.
- Ladle into jars, leaving 1/4 inch of head space in each jar. Use a plastic knife and run it down along the inside of the jar to remove any air bubbles. Wipe off the top edge of jar and around the “threads” with a clean, damp cloth.
- Center a lid on each jar and then screw on the band, just finger tight.
- Place the jars in the rack and lower into the boiling water. Using two sets of tongs to do this will save your hands from burning. Process jars for 10 minutes.
- Raise the rack with the tongs and let it rest on top of pot for 5 minutes, and then remove each jar (use an oven mitt or a jar lifter) and set aside to seal/cool in a draft-free location, and leave them alone for 24 hours.
- It’s fun to listen to the ping of each individual lid as they seal. You can check the seal by gently pressing in the middle of each lid. If sealed correctly, there will be no give. If there is give, you need to wait for the ping and check again.
NOTES: The diced peppers are not necessary, but I added them for color. If you have never canned using the water bath method, please look at the Fresh Preserving website for more detailed instructions. I filled all of my jars at one time, but the rack only holds 7 pint jars at one time and I had 3 more. As I was processing the first 7 jars, the other jars “pinged” and sealed. After checking with my local canning guru, we determined that those jars still needed to be processed to reach the right temperature to avoid spoilage. If you have a partial jar at the end of filling your jars, put a lid on it and place in refrigerator after it cools. You can use this one right away!