
These easy-to-make and also easy-to-customize granola bars have become a family camping tradition! But we have them other times as well.
It didn’t take long for this recipe to become an annual camping trip favorite. Once I made it once, it was requested every time. In fact, I don’t think it “counts” as a camping trip unless at least one pan of these has been packed with all our stuff for the trip!
What to Include
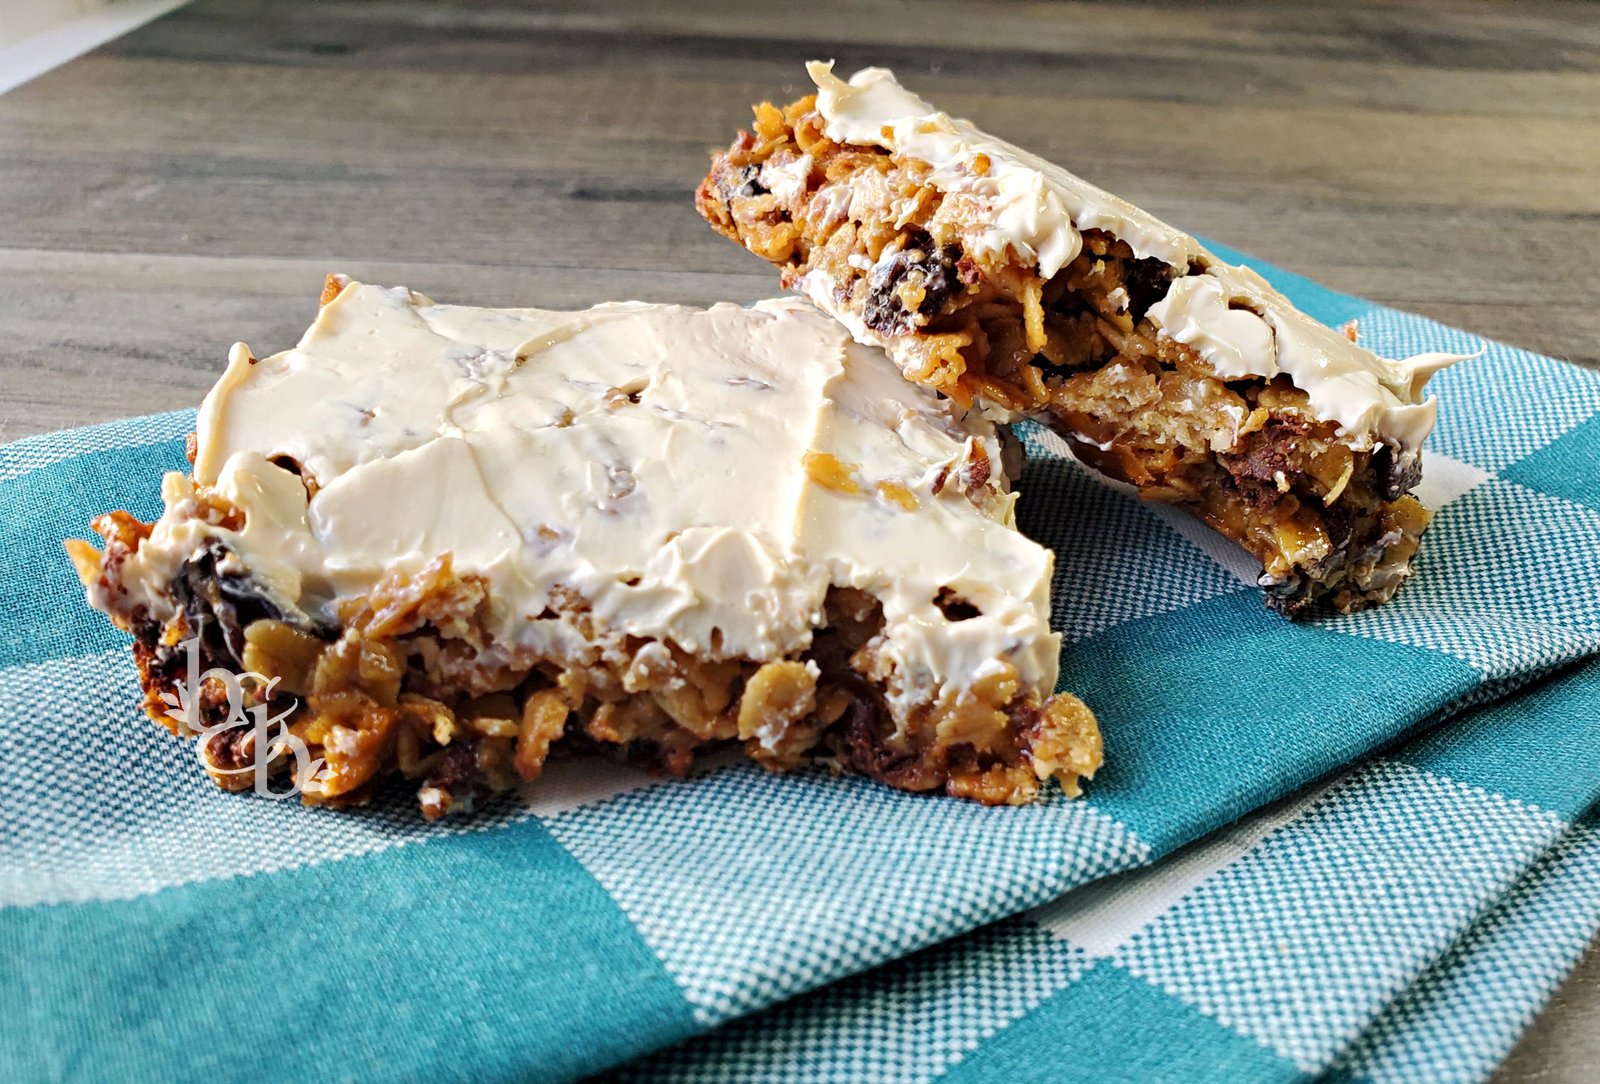
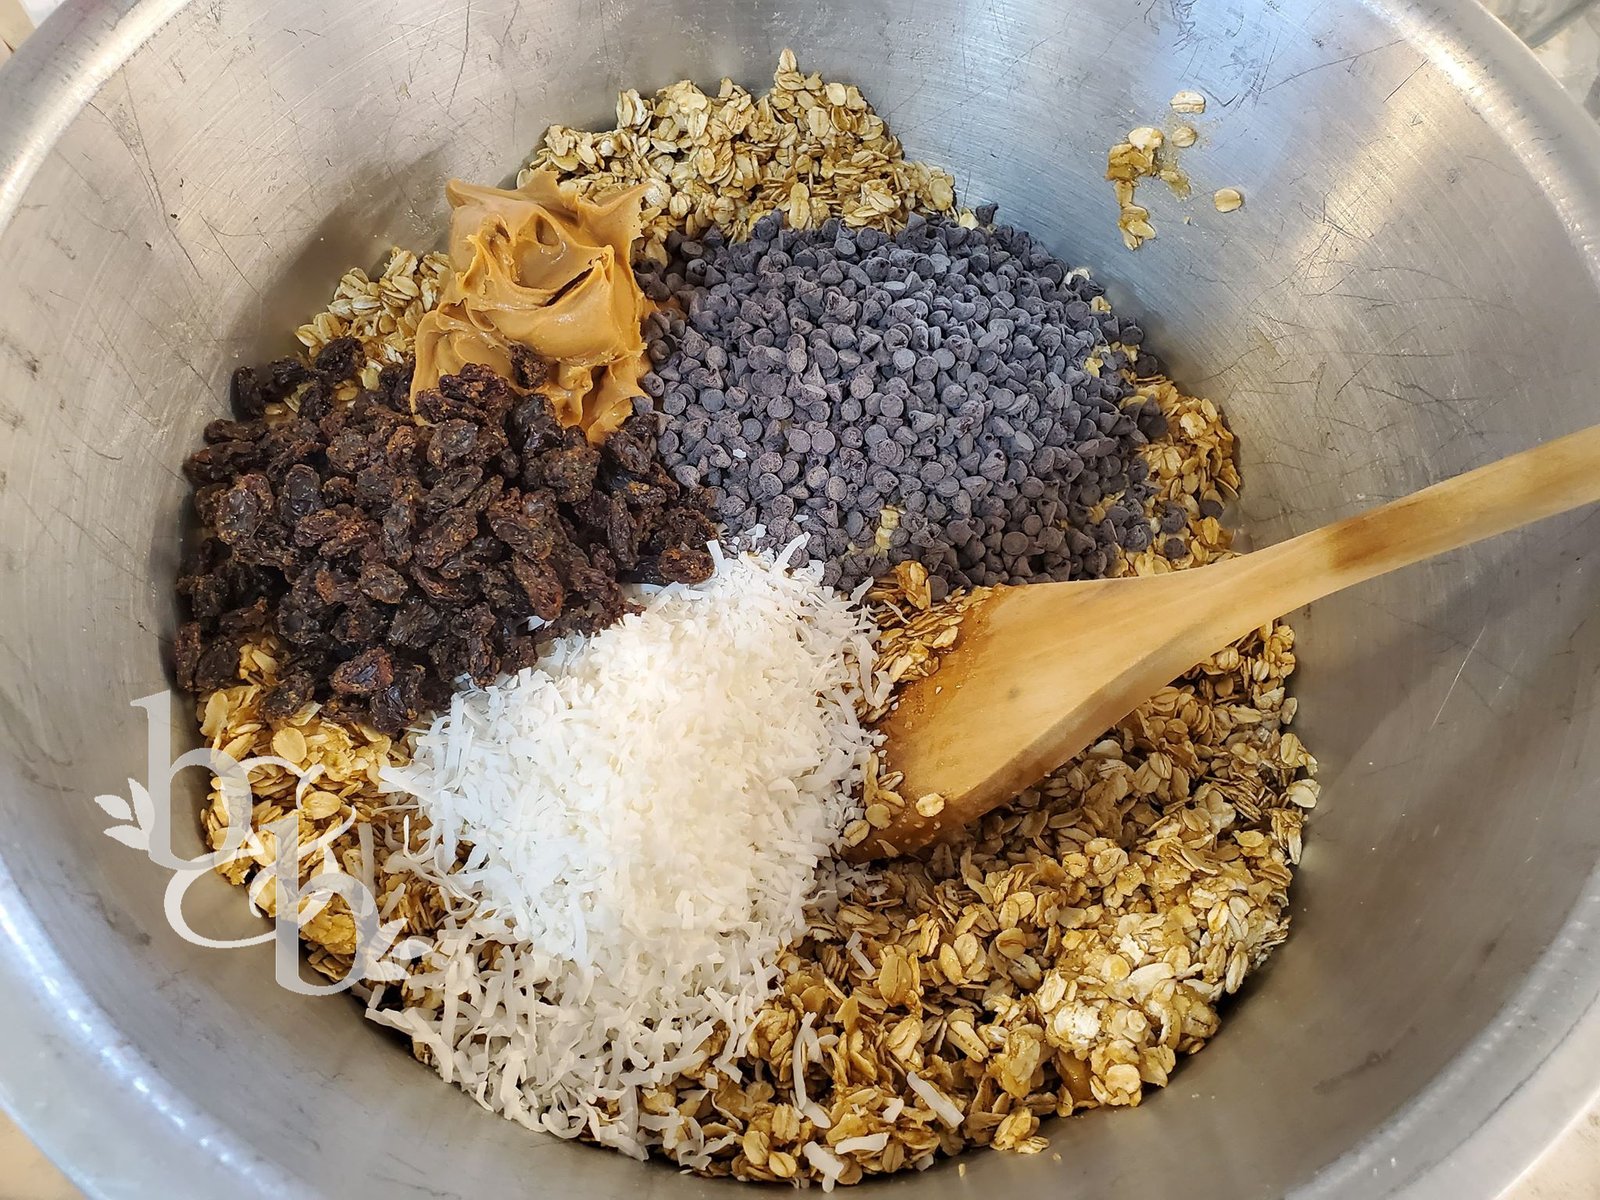
Although you can put just about anything into these Easy Camping Granola Bars, I find that we are typically making them the same way every time (tradition, right?). Always peanut butter, always coconut, always mini semisweet chocolate chips, sometimes raisins (half the loves, half the family is repulsed). And always topped with vanilla a’peels from Guittard.
But one of these days I’d love to try some variation of nuts, seeds, and some dried tropical fruit! Maybe a smaller test batch is in order?
A Few Tips
You’re going to want to mix up these easy granola bars by hand. Yes, it’s messy. Yes, it weirds me out a little. But I kinda like it too. Feels very primitive. Seriously though, it’s the easiest way to make sure all those ingredients are evenly distributed.
Watch that cooking time! I typically take them out sooner than the pictured pan; but one thing I loved about this batch was the extra flavor from how the sugar caramelized with a little bit longer cooking time. Either way is fine; just know that the longer it cooks, the chewier the granola bars tend to be.
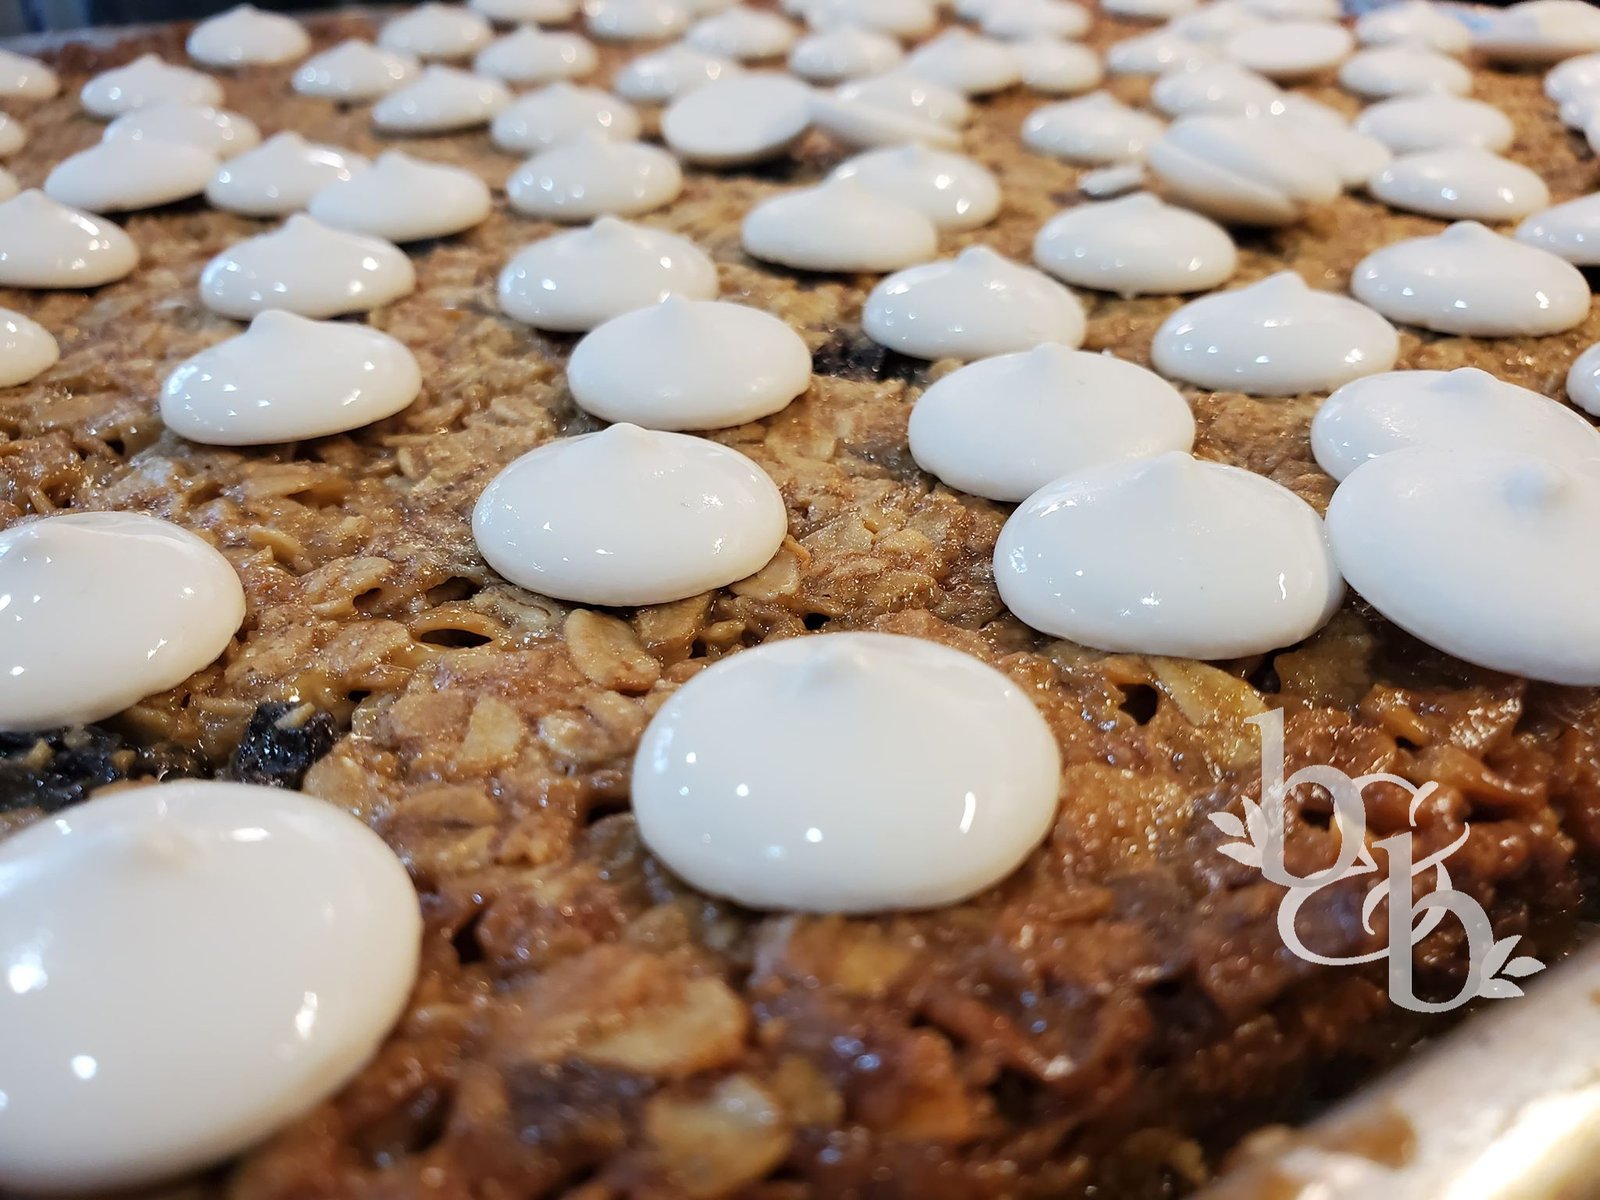
What the heck are a’peels? I use those because I have them on hand. But you can use Wilton candy melts or white chocolate chips, or some other flavor. Once the topping has melted and cooled (totally optional, by the way), you’ll want to go ahead and cut the bars partially, especially along the edges of the pan. And do this while it’s still hot. You’ll thank me later. Well, your forearm muscles will anyway.
For travel, I like to wrap these individually in wax paper and tape closed with some Scotch tape. They hold up great, as they are quite thick, in a backpack.
Love Oatmeal?
I certainly do. Easy Camping Granola Bars are one of my favorite ways to consume it! If you love oatmeal, you may also be interested in my tip for Overnight Soaked Oats or in these Flourless Banana Chocolate Chip Muffins, a popular recipe from a contributor on our old recipe blog.
PrintEasy Camping Granola Bars
- Yield: 2–3 dozen, depending how you cut 1x
Description
These easy-to-make and also easy-to-customize granola bars have become a family camping tradition!
Ingredients
- 8 cups old fashioned oats
- 2 cups sugar
- 2 tsp. salt
- 1 cup butter, melted (2 sticks)
- 2 tsp. vanilla
- 2 Tbsp. molasses
- 1 cup light corn syrup (or honey)
Ingredient Additions
- 1 cup peanut butter
- 1 cup mini semisweet chocolate chips
- 1 cup raisins
- 1 cup unsweetened coconut flakes
- about 3 cups of vanilla a’peels
Instructions
- Preheat oven to 400 degrees.
- In a very large bowl, combine the oats, sugar, and salt. Stir well to combine.
- Melt the butter in a 4 cup microwave glass measure (or bowl). To this add the vanilla, molasses, and corn syrup. Whisk to combine.
- Pour butter mixture over the oat mixture and stir to combine completely.
- To this add your ingredient additions. Once added, use your clean hands to mix, squeeze, and combine all the ingredients into one cohesive mixture.
- Press the mixture into a large greased sheet pan and flatten the bars into an even layer.
- Bake for 15-20 minutes to desired doneness. Bars should at least be gold and slightly bubbling on the edges. Leave in a few minutes longer if you want a more caramelized flavor.
- Immediately sprinkle the vanilla a’peels over the hot bars. Allow to sit until they are shiny and melted through, then use an offset spatula to evenly spread the melted candy over the top.
- At this point, it’s a good idea to cut through the bars partially, especially around the pan edges. This will save effort and time later when the bars have cooled and set and you’re ready to serve or wrap them up for later.